This article will show you how to easily screen capture on your Microsoft Surface Pro using 2 different options.
I hope your enjoying your Microsoft Surface tablet / laptop hybrid. I’ve owned and used the RT, Surface Pro 2, and now the Surface Pro 3 core i7 model. There are a thousand reasons you may need to screenshot or screen cap from your Surface gadget. Here are 2 easy, built-in ways to capture your screen.

These 2 methods have worked on all my Surface gadgets.
METHOD 1 TO SCREEN CAP SURFACE PRO (2 on tablet presses)
- Press and hold the “capacitive” Windows button on the front of your Surface Screen(on the bezel) with your right hand.
- Continue holding the windows button and then a single press the Volume Down button with your left hand.
The screen will go slightly dim for a just a quick moment when you’ve done it right.
METHOD 2 TO CAPTURE SCREENSHOT SURFACE PRO ( Keyboard 3 key-combo )
- Press and hold the windows Key(left hand), and the Fn(function) Key(right Hand), then just tap the space bar with your favorite 3rd finger or thumb.
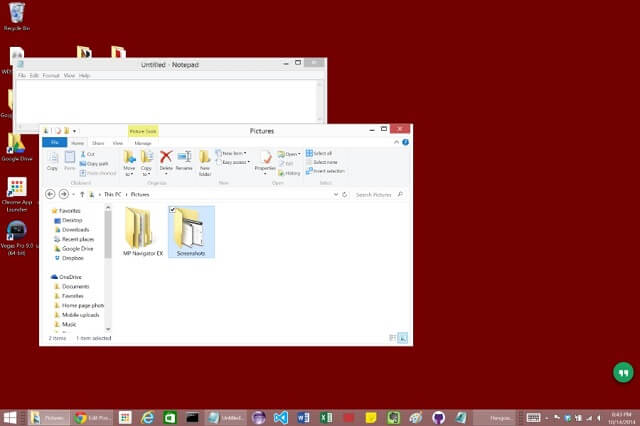
WHERE ARE SCREENSHOTS SAVED ?**
The Screenshot will be saved in This PC > Pictures > Screenshots.. AKA C:\Users**YOU**\Pictures\Screenshots

If you’re a dropbox user, you can enable a setting that will also copy the screenshot to your clip board, which can be handy(when applicable). If you’re not a dropbox user, you should consider finally signing up here.
- LOOKING FOR ACCESSORIES FOR YOUR SURFACE PRO? YOU MAY LIKE TO CHECKOUT Surface Pro 3 Accessories on Amazon here
- READ MY REVIEW OF THE SURFACE PRO 3 DOCK HERE
