There is plenty of information out on the web that detailS how to create your own custom PS3 Themes, but in thanks to the 4,000 downloads of Booya Gadget Themes I thought I would share with the Booya Gadget community my strategy for building Themes.
The process is simple and easy enough for any user depending on how custom you would like to make the theme.
- Step #1 “Getting the Tools”
Recently I found a great tool to help ease the process of building PS3 Themes and it also comes with a great emulator that will allow you to see your theme in action and reduce running back and forth from the PC to the PS3 testing your theme. Available over at PS3-Themes.com you can download the Theme Builder.
- Step #2 “Create your Background”
All of my themes start with the creation of the background. The background image is what will set the tone for the theme and the icons will be created based upon the theme that the background creates. In this tutorial I will be using the latest theme I created called “By The Seaside”. At Booya Gadget most of our theme backgrounds are built in 3DS Max. I won’t be going into that creation process today as that is for another, much longer tutorial later.
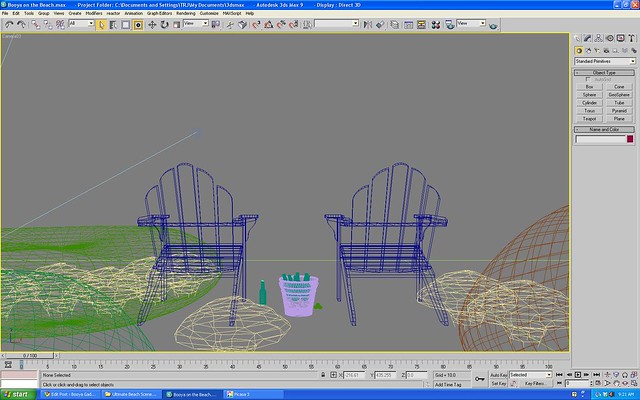
For most users out there backgrounds can be created in any form. Capture some moments with your personal camera, do a google search for your some of your favorite shots. Either way it is the final resolution of the background that is most important. Make sure you capture a scene that is 1920 x 1080 for HD displays.
Once you have you background make sure it is 1920 x 1080 and in JPEG format. You will need to use a photo editing software to create a SD version for those PS3 users that are not using an HD display. Resize the picture to 640 x 480 to create that SD image.
Open up PS3 Theme Builder and click on the “Backgrounds, Notifications, & Sounds” tab. From this tab you can insert your HD image and your SD image. You can also upload more images that the PS3 will cycle through randomly. Our PS Move Theme uses this feature. Once you are done it is time for some icons.
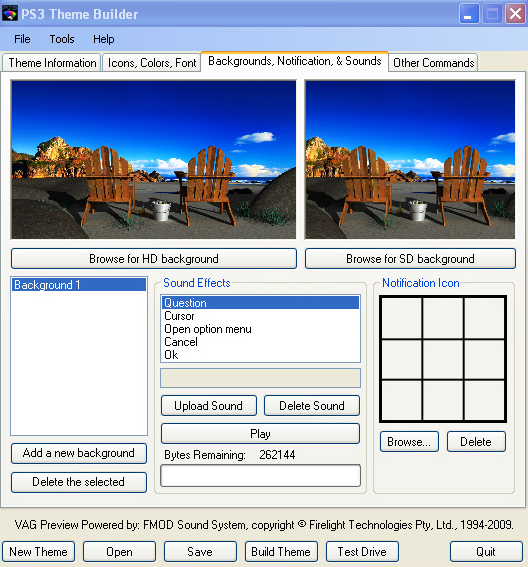
- Step #3 “Create your Icons”
Icons should match the theme you have created and be a compliment to your background scene. Typically I try to modify the already familiar XMB icons into something that matches my scene. For “By The Seaside” I went with a simple Sand Dollar Icon. Using Adobe Photoshop I placed each of the usual XMB icons onto the Sand Dollar and colored them to match the Shell.
Icons must be 128x128 and saved in PNG format to work with your PS3 Theme. This is a small format to work in so usually I start with a bigger template and compress the file later. If you aren’t the creative type there are millions of icons available for free on the internet. Typically at Booya Gadget we will only modify the XMB icons. You can edit/modify every icon in the Theme, it is purely a personal choice.
One of the major reasons we stay focused on the XMB is that Sony is constantly adding features, which adds icons that would make our Themes start to look outdated.
Once you have all of your icons edited to your liking and saved in PNG format at a resolution of 128x128 you are ready to load them into PS3 Theme Builder. Go to the “Icons, Colors, Font” tab and you will see the XMB titles. Load your icons into their respective place. Under this tab you can also select from 3 different fonts types. Once they are all loaded in it is time to fill out the Theme info and get a preview of your creation.
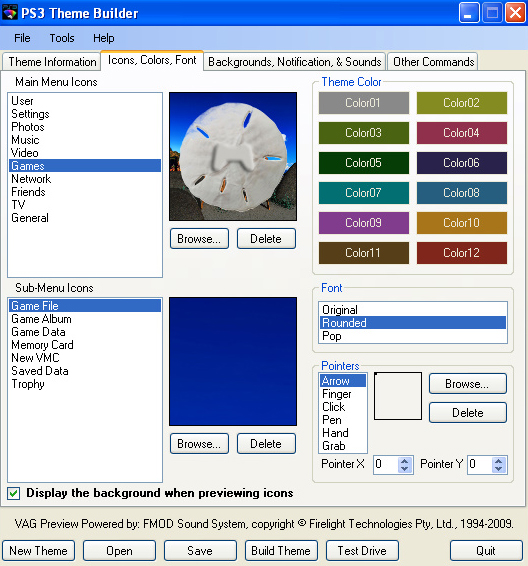
- Step #4 “Creating your Creation”
Once all of the icons are loaded and the background is in place it is time to fill out the “Theme Information” tab. You can fill out information for all different areas of the globe. At the very top you can enter the name of your theme. Make it original and relative to your theme so you can decipher it once it is loaded onto your PS3. Enter your Author information, Genre, URL and the version number. You can also do a short write up in the comment box.
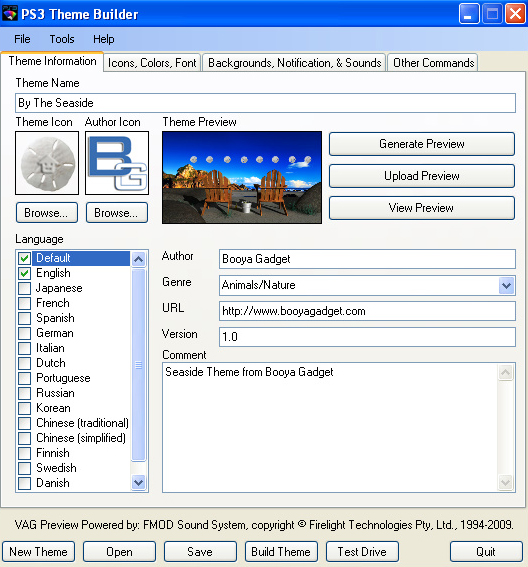
Next we have a couple of extra icons that we will need to create. The first icon is the Theme Icon. This is the icon you will see when you go to select Themes on your PS3. Unlike the other icons you have created this icon has to be 64x64 and saved in PNG format.
The second Icon we have to create is Author Icon. This icon will represent the creator of the theme. In all of our Booya Gadget creations this is where we place the Booya Gadget Icon. Once again this icon must be 64x64 and saved in PNG format.
Now you can click on the “Generate Preview” button. This will be the first time that you will see your them. There are several different selections of how to view your theme and create your preview. At Booya Gadget we use the first option “Xross Media Bar” Click the bottom “Click here to save the preview and close.” This will save the preview into PS3 Theme Builder.
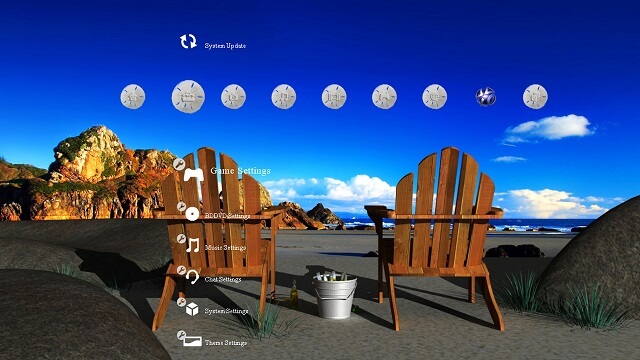
- Step #5 “Take your Theme for a Drive”
The nice thing about PS3 Theme Builder is that it comes with a PS3 XMB Emulator. This allows you to get a look and feel for you theme before you send it down to the PS3. Click the “Test Drive Button” and it will load your theme. Use the directional arrows to move around and see if everything is looking the way you envisioned.
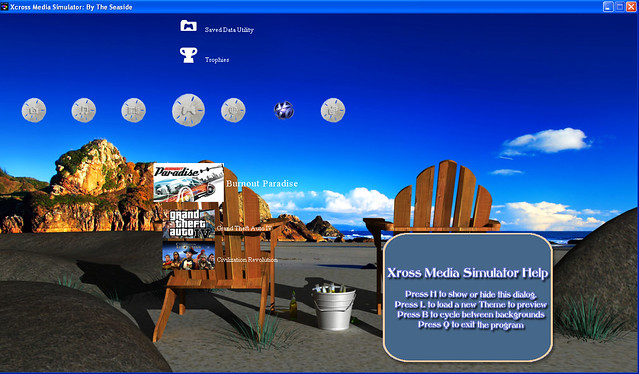
- Step #6 “Generate your Theme”
The final step is the easiest step. If everything is looking great then it is time to generate your theme. Click the “Build Theme” button and let the program do its magic. You will get an error message if anything is out of sorts, but if the theme was created properly then just hit enter and a P3T file will be created in your PS3 Theme Builder directory.
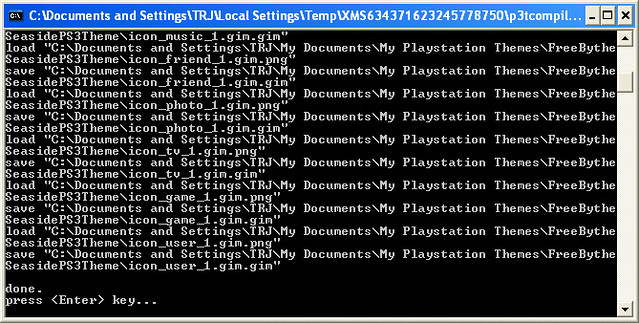
The next step is to load that file onto your PS3 and marvel in your excellence.
Good Luck in building Themes. If you don’t want to try and experiment with the process then know that Booya Gadget will have you covered. We plan to continue to release themes to our users and we hope that you enjoy them. Thanks to all who have downloaded. To get the “By The Seaside” the theme we used in the tutorial head to our Free Stuff page and download “By The Seaside”.
